I’ve been struggling to find time to sew recently, with a job and a toddler rushing around me constantly. Exhausted is just half of it! But I jumped at the chance when Jasmin was looking for pattern testers for her latest sewing pattern, The Daphne …
The Helene Selvedge Jeans pattern has been a long awaited one. Over lockdown I watched Anna Allen’s Instagram posts closely as she shared pair after pair of amazing jeans, she was making herself. I knew she was planning to release them, but as usual wanted …
To get myself back into sewing again I needed a quick project, I chose the Twig and Tale Sunny Hat. It’s been a while since I’ve sewn anything, with a new baby I’ve been quite busy. She has just started napping for longer periods of time, so it was time to get started.
SELECTING A PATTERN
I knew I wanted to make a sunhat for Robin as the weather was getting sunnier, and it was something she really needed. I searched around and came across the Twig and Tale Sunny Hat pattern. Which is actually a free pattern, so even better. The Sunny Hat is also available in 11 sizes, from newborn to adult.
Sunny Hat Sewing PROCESS
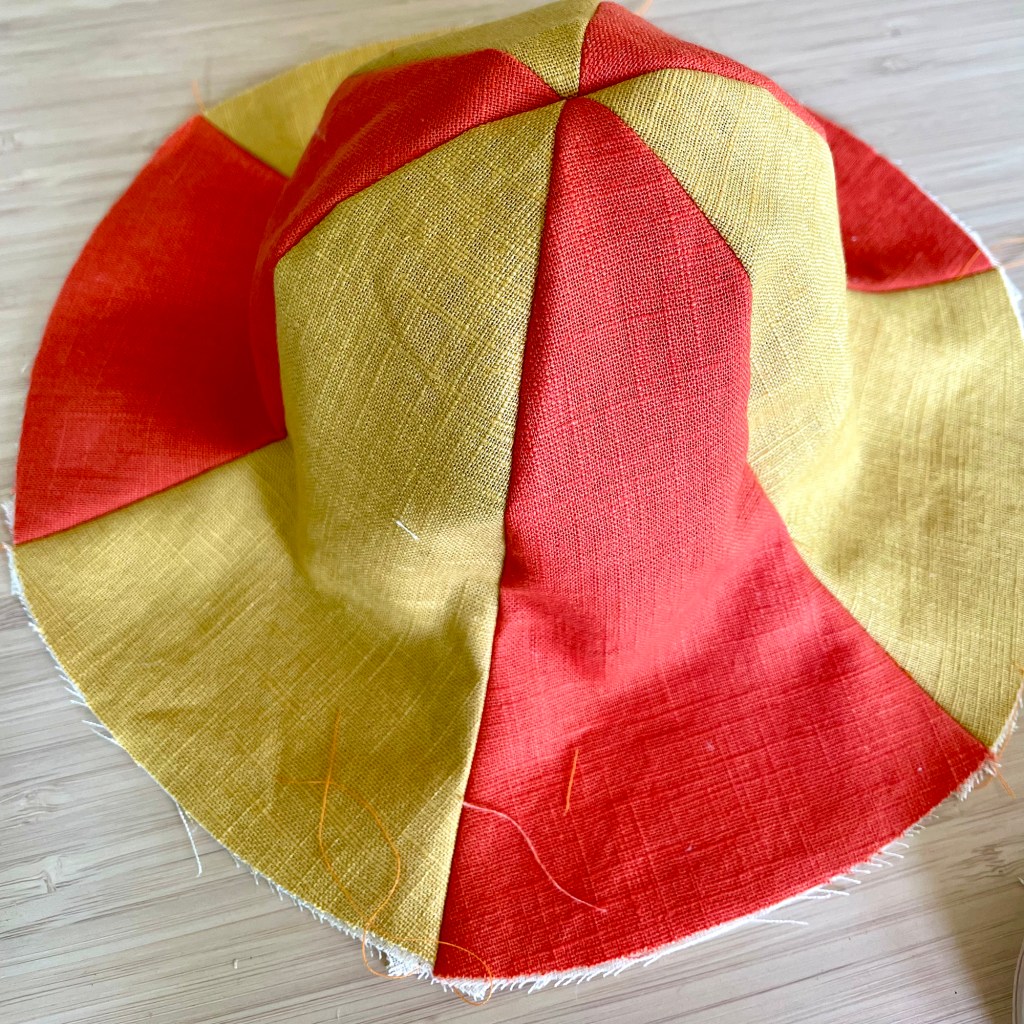
The Sunny Hat is made up of 6 panels, so it is perfect as a scrap-busting project. I have a box of scraps that I save for the perfect project. In it I had these lovely Eco Enzyme washed Linen pieces originally from Minerva that were the perfect size. As the hat is lined, I also dug out some lovely Liberty Lawn from Minerva. I used the Liberty lawn fabric originally for a vintage pattern I made. It also asked for some interfacing for the brim, but I just used some leftover medium-weight calico I had in my scraps.
I was extra careful when I cut out all the pieces, as just a couple of mm difference would soon add up and end up making the hat too big or small. I don’t think I’ve ever taken so long to cut out such a small pattern. As I was working with scraps it was hard to layer them as I usually would for cutting out.
I started by attaching two panels together with the facing and immediately made a mistake. I attached a piece of the facing on the outside – mum brain in action. After unpicking and starting again, it all went smoothly. I made two half hats of 3 panels and then sewed a smooth curve seam to make the shape of the hat, then repeated the process for the Liberty lining. I then put the two hats’ right sides together and sewed around the brim. Turned it through and the hat is complete.
It was straight on Robin’s head before I could even press it for a sunny day in the garden.
ADJUSTMENTS
I only made one adjustment, and that was to take a couple of cm off the brim of the hat so it wasn’t too big. Although it’s a sunhat I still wanted her to be able to see, as I know she’s a nosy baby.
WOULD I MAKE THE SUNNY HAT AGAIN?
The instructions for this pattern were impeccable, especially for a free pattern so I will definitely be making it again. There are so many sizes of the sunny hat, so I’m sure Robin will be wearing it for many years. Also, on the Twig and Tale website you can buy a super cute add-on to make the hat into a little flower, adorable.
If you enjoyed this blog post be sure to subscribe on the right, you’ll then get not-so-regular updates from me. It really helps me create great content; I can’t do it without your support
Versatile maternity clothing, I’m really running low on this. I’m currently shuffling through two to three dresses on rotation. Quite a few of them aren’t weather appropriate but they fit and that’s a win for me. But I definitely needed another maternity dress. Choosing a …
I thought today I would share one of my favourite and definitely most popular makes to date. This is a self-drafted dress I made in collaboration with Minerva. This was my first make for Minerva who kindly gifted me the fabric in exchange for a …
As soon as I got the pattern for the Nita Wrap Skirt I knew I wanted to make it straight away. So rather than wait to buy some fabric I dug into my stash.
Over the years I have accumulated quite a large amount of
fabric, a mixture of vintage and quirky patterns that catch my eye. Most of
them are natural cottons, silks and viscose which are much better for the environment
than man made fabrics. This also means they are better to sew with.
Making the Nita Wrap Skirt
Luckily I had this fab heavy Ikea cotton on my shelves just
waiting to become a skirt. The Nita Wrap Skirt pattern is a PDF and you can select
the different sizes you want to print. This makes it really easy to use. I
started by making a toile in size 6. But I wasn’t paying attention and didn’t read
the instructions, therefore I added extra seam allowance to the pattern and
made it way too big. But after realising and taking it in it fitted perfectly.
So for me this pattern didn’t need any adjustments.
Another great thing about the Nita Wrap Skirt is because it’s
a wrap it is very giving with the fit, so if you chose a size large or smaller
you can just adjust the button or fastening placement to make it fit you. It
comes with 3 different lengths, I went for the mini as its more flattering for
me, and 3 different fastenings; D ring, button or tie.
For mine I chose the button fastening, I decided to add two
button holes but 3 buttons so I can adjust the size for the days I eat too much
and need to let it out, as we all do haha. The buttons I used are vintage, also
from my stash and I really think they finish it off nicely
Pros
Quick Make
Selectable Sizes on PDF
Multiple style options
Easy to fit
Flattering
Cons
No page number printing guide for PDF
No pockets
Will I make it Again?
Yes definitely, I’m already planning it, but I’m going to draft some pockets onto the next one. You can purchase the pattern over on the SewDIY website.
Have any of you made the Nita Wrap Skirt? Let me know what you think either here or on my insta